
While I may run around the world as an audio programming superhero by night (cape and everything), 5 out of 7 days during the week I spend a majority of my time at a desk.
During that time, I’m mostly in one of 3 programs – Outlook, OneNote, or Visual Studio.
I used to find Visual Studio completely confusing, bloated, and intimidating. After a few months of working in it, and hanging out with developers who know it more than I do, I’d love to take some time to demystify some of it for you a bit.
FYI this post assumes you’re at least familiar with what Visual Studio is (an IDE), and you’ve poked around it a bit. Also, you’ll need a Github account. But keep in mind that the more scared and intimidated that you are, the better – we can kill some of your fears!
Source Control in Visual Studio
For those who don’t know, Visual Studio works pretty seriously in tandem with Team Foundation Server – Microsoft’s proprietary version control system. I regularly work in Visual Studio Enterprise edition, and it’s pretty clear that Visual Studio favors TFS above all else. Though I haven’t tried it, you supposedly can use a hosted version of TFS with Visual Studio Team Services. That starts out free for 5-member or fewer teams.
For personal projects, however, most people know Git and Github considerably more than they know TFS. Therefore I think it was pretty brilliant and intuitive that managing Git repositories is available via Visual Studio!
For me it’s excellent – I can manage many different types of projects all from one single software, and it does a pretty fantastic job of managing it all too.
Getting Started
I’m going to discuss only the basics of hooking up an existing Github project to Visual Studio Community Edition here. This will work in any edition of Visual Studio 2015 or 2017 – no promises for anything older or newer!
Also, there is a Bitbucket plugin for Visual Studio, and in theory, you should be able to hook up Bitbucket accounts as well – but I personally haven’t done it yet.
Team Explorer
On opening Visual Studio, you’re looking for the team explorer – it’s on the right-hand side of your screen.
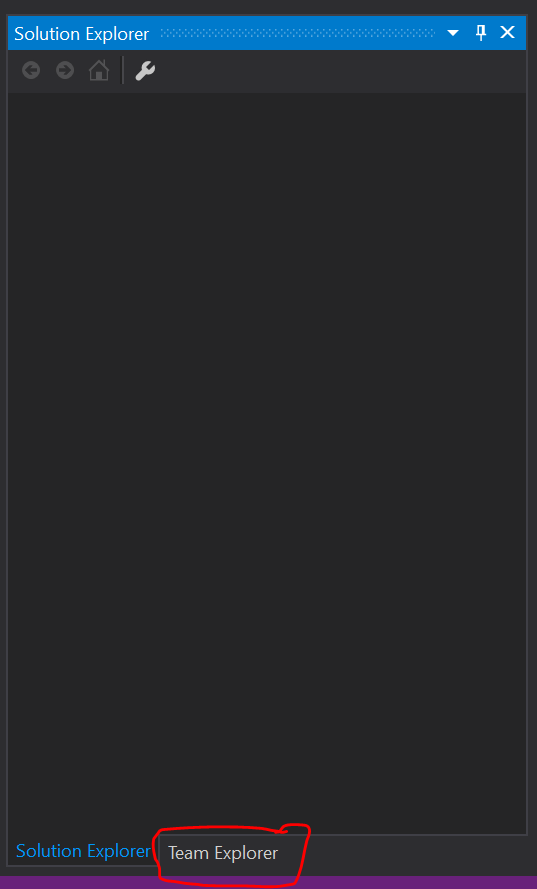
Once under the Team Explorer tab, you’ll see something like this:
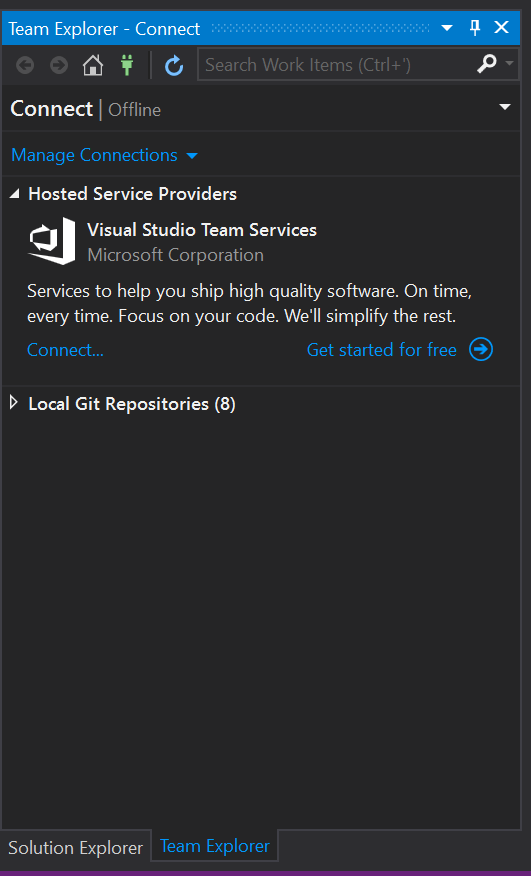
You can pretty clearly see here “local Git repositories” – and that I have 8 projects attached. What’s additionally cool here is that if you’re logged into the same account across multiple computers Visual Studio will automatically hook your Git projects up to any new installation of Visual Studio.
Once you’re here if you open up your Git repository tree you’ll see something like this:
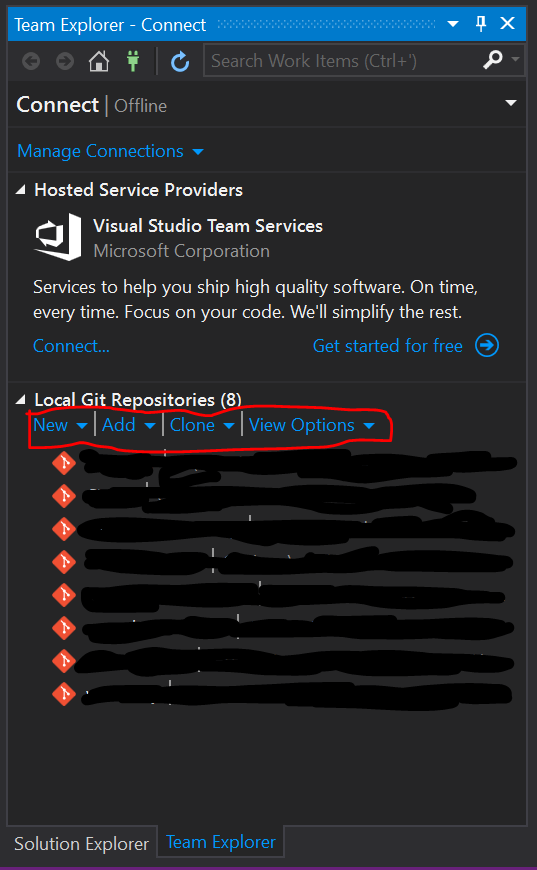
In the menu there you can see “New”, “Add”, and “Clone”. New and Add will allow you to create or add existing local Git repositories to Visual Studio. Clone is what we’re really looking to use here.
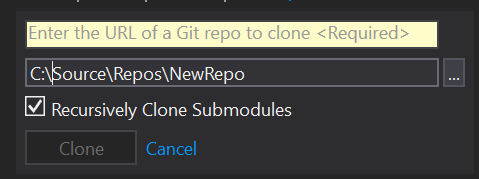
Clone will ask you to supply the URL to an existing Git repository, like this:
On Github, you can grab your existing repository’s URL by browsing to your repository and clicking the button below:
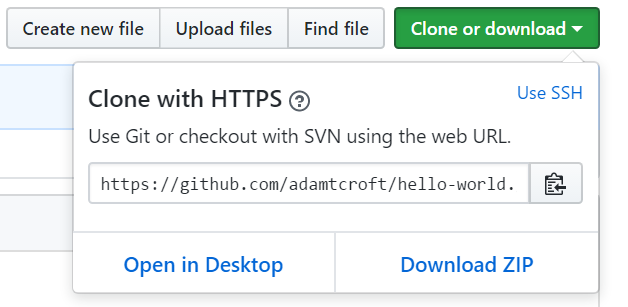
Copy that HTTPS URL into Visual Studio’s Cone dialog and your project will automatically be cloned locally and become accessible within Visual Studio!
Copyright 2016-2021, NIR LLC, all rights reserved.